Zelda Tears of the Kingdom Orochium Shrine solution – complete Courage To Fall
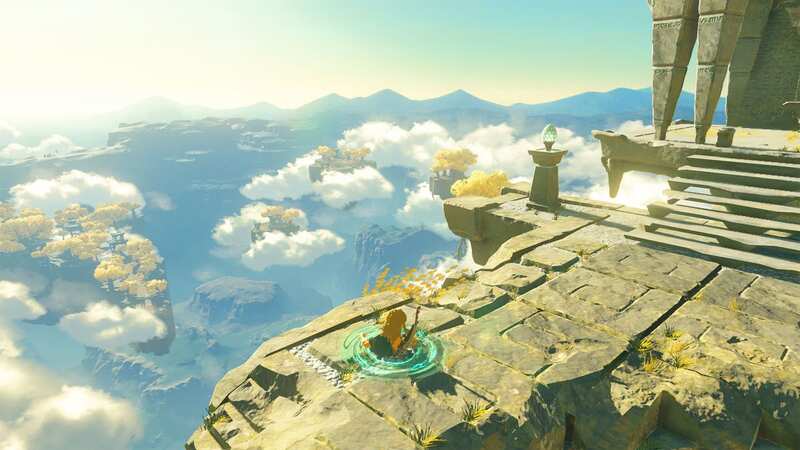
Orochium Shrine is one of the tricker shrines in Zelda: Tears of the Kingdom, requiring smart use of Link's abilities and a few leaps of faith along the way.
Zelda: Tears of the Kingdom has over 150 Shrines, and as you can imagine, a fair few of them are extremely difficult to figure out in true The Legend of Zelda fashion. Locations like Kiuyoyou Shrine and Mayachin Shrine, can be head scratchers, especially considering how early on in the game you can stumble upon them.
Orochium Shrine is another puzzler and can be found in the northwest of Hyrule, towards the Hebra region; it's in the Tabantha Tundra to the west of the Great Hyrule Forest. The closest landmark to this shrine is the Snowfield Stable. You'll need the Pikida Stonegrove Skyview Tower activated to see this section of the map, however the Shrine itself is actually closer to the Lindor’s Brow Skyview Tower.
While you're in the region, if you haven't captured Zelda's Golden Horse, now's a good a time as any although you will have to have started the Potential Princess Sightings quest which you can pick up at the Lucky Clover Gazette.
Orochium Shrine – Courage To Fall solution
This is one of the weirder early-game shrines in Zelda: Tears of the Kingdom. Once you walk into the arena, you'll see two big doors in front of you. Use Ultrahand to open them up and you'll notice a laser field ahead which collapses the floor once you hit it. While the challenge is called Courage To Fall, falling down here just means death for Link.
 Nintendo Switch 2 release set for next year as Zelda ushers in the end of Switch
You'll notice a Construct roaming about to the left of the door – head down that way, defeat the Construct and you'll reach a dead end. Or it would be a dead end if you didn't have the ability to rise through the roof using Ascend on the block sticking out from the wall. After that climb the ladder and head through the small gap in the wall, and jump off the ledge to the right.
You'll find a couple of Constructs, and a new door here. Head round the corner to the right side of the door and you'll find this Shrine's hidden chest, which gives you the grand prize of five arrows. Head back and open the doors using UItrahand once more.
You'll notice more lasers, however these are far easier to dodge than the first encounter, which is great! Except you don't want to dodge these ones at all – hence Courage To Fall. Walk into those lasers and you'll drop down to a new floor with another laser hallway to navigate. Walk to the end of the room and use Ascend once you reach the brown floor with the pattern with a ledge above it and you'll come across another chest – this one containing a small key.
Ascend once more through the ceiling and you should see a staircase down to a big square pillar with two Constructs guarding it. Defeat them, then use the small key to open that big square room where you'll find a ball. Grab that ball with Ultrahand and head back up the stairs you come down.
On either side of the room are lifts; take either one up and you'll find a funnel to pop your ball in, which opens up a gate on the left with a glider inside. Use Ultrahand to position the glider on the rail, then use the ability to pick up the ball from the funnel and stick it to the glider. Then hop aboard, and hit the glider's fans to get it flying.
You'll float over to the are you started the Shrine in, which conveniently has another ball funnel on the left hand side if you're facing the Shrine entrance. Pop the ball in there, head into the newly opened room, and activate that Zonai sign and you've completed the Orochium Shrine.
Read more similar news:
Comments:
comments powered by Disqus